


Dragon Cake Tutorial
- Monarch Baker
- Jul 24, 2018
- 1 min read
Updated: Oct 8, 2018
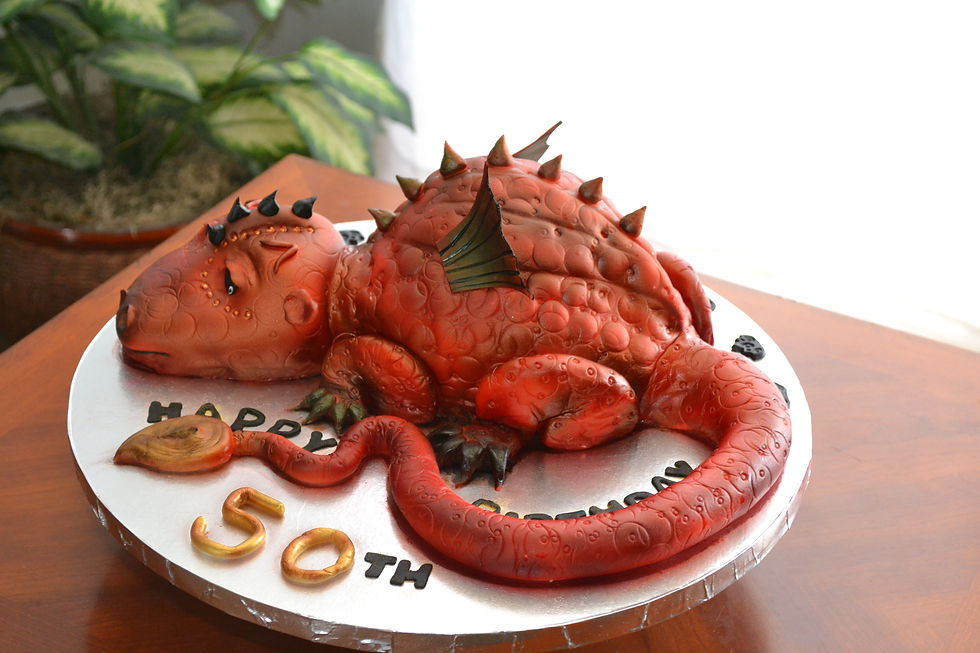
I baked four 8" round cakes. I sculpted them into the body and head, then placed them together positioned on the cake board where I wanted them. After that i proceeded with the crumb coat with a standard buttercream recipe.

After applying the final coat of buttercream, I then added fondant to the entire cake. I used various icing tips to create detail markings. I also sculpted the eyes, nostrils, mouth, and added ears and eyebrows.

The tail and legs were added and made using only fondant. Same icing tips were used to continue the markings and detail to match the rest of the body. I used my sculpting tools to add the lines on his body.

Now it was time to start airbrushing him. I used Americolor airbrush: copper, holiday red, and gold. To airbrush the nostrils I added some black to the mixture. Warm brown was then used to add definition. Gold was used for the tip of the tail over the copper red, gold, mixture. His eyes were sculpted with black fondant and white gumpaste.


Spikes were sculpted and airbrushed using the same colors as the body but then warm brown lightly. Spikes were attached with piping gel. Wings were made with gumpaste and airbrushed with same color mixture and then black gently over it and attached with piping gel.

I felt like his head kind of looked like a dog, so I added spikes using gumpaste and airbrushed them with black to make them darker and attached them using piping gel.

And here you go, the finished product!


Comments